SMTP DANE with DNSSEC for Exchange Online

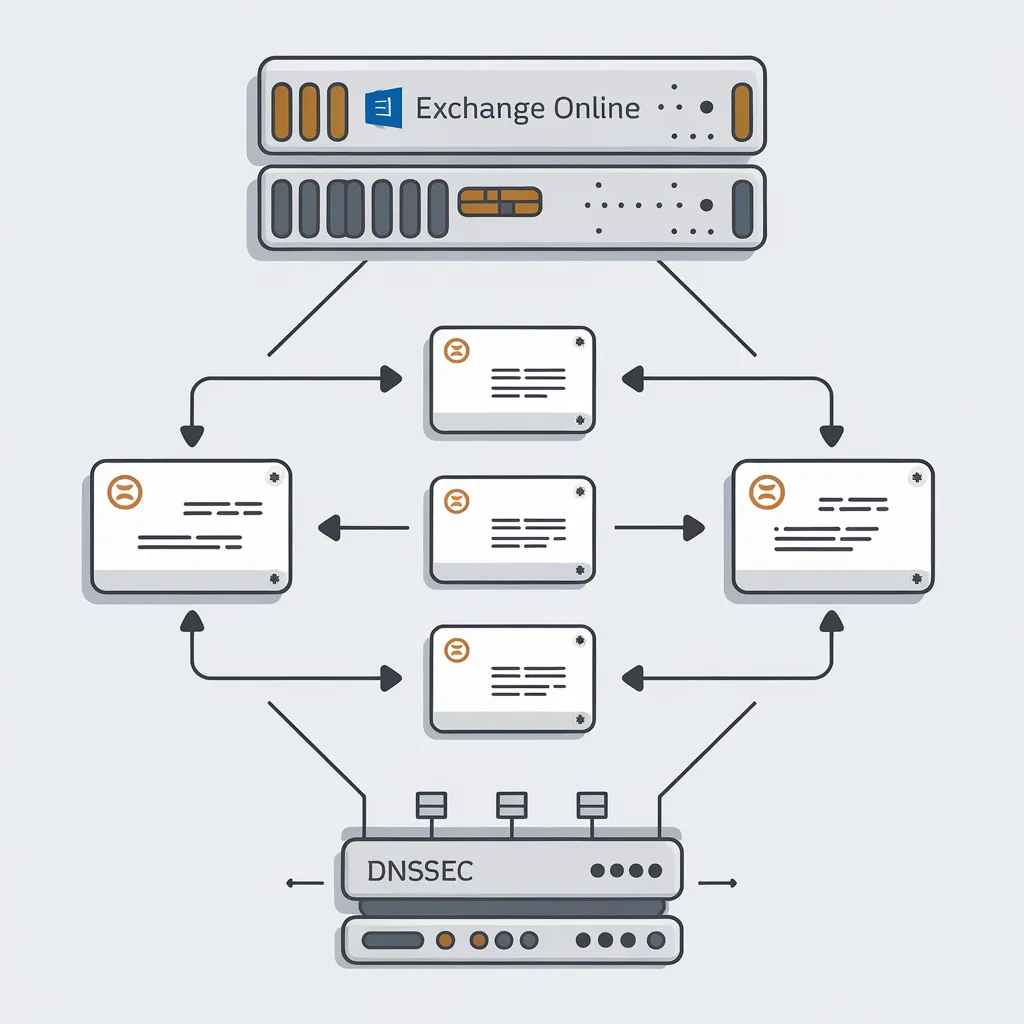
What are DNSSEC and SMTP DANE?
On Oct 28, 2024 Microsoft announced “General Availability of Inbound SMTP DANE with DNSSEC for Exchange Online”
This has been a highly anticipated feature for organizations looking to enhance the security of their email communications. DANE (Domain-based Message Authentication, Reporting, and Conformance) is a protocol that allows users to verify the authenticity of incoming emails by checking the DNS record of the sender's domain. By enabling DANE with DNSSEC (Domain Name System Security Extensions), Microsoft Exchange Online provides an additional layer of protection against man in the middle attacks. This how to also assume that there is nothing in front of your Microsoft 365 tenant, all email goes directly to Microsoft. If you have a 3rd party provider in front of Microsoft, such as Mimecast, you will have to use their solution.
1. Verification of DNSSEC
Use this web-based tool to confirm that your DNSSEC is enabled and configured correctly. If your domain is not configured with DNSSEC, will need to enable it via domain registrar. Once enabled, some time will have to pass for DNS propagation.
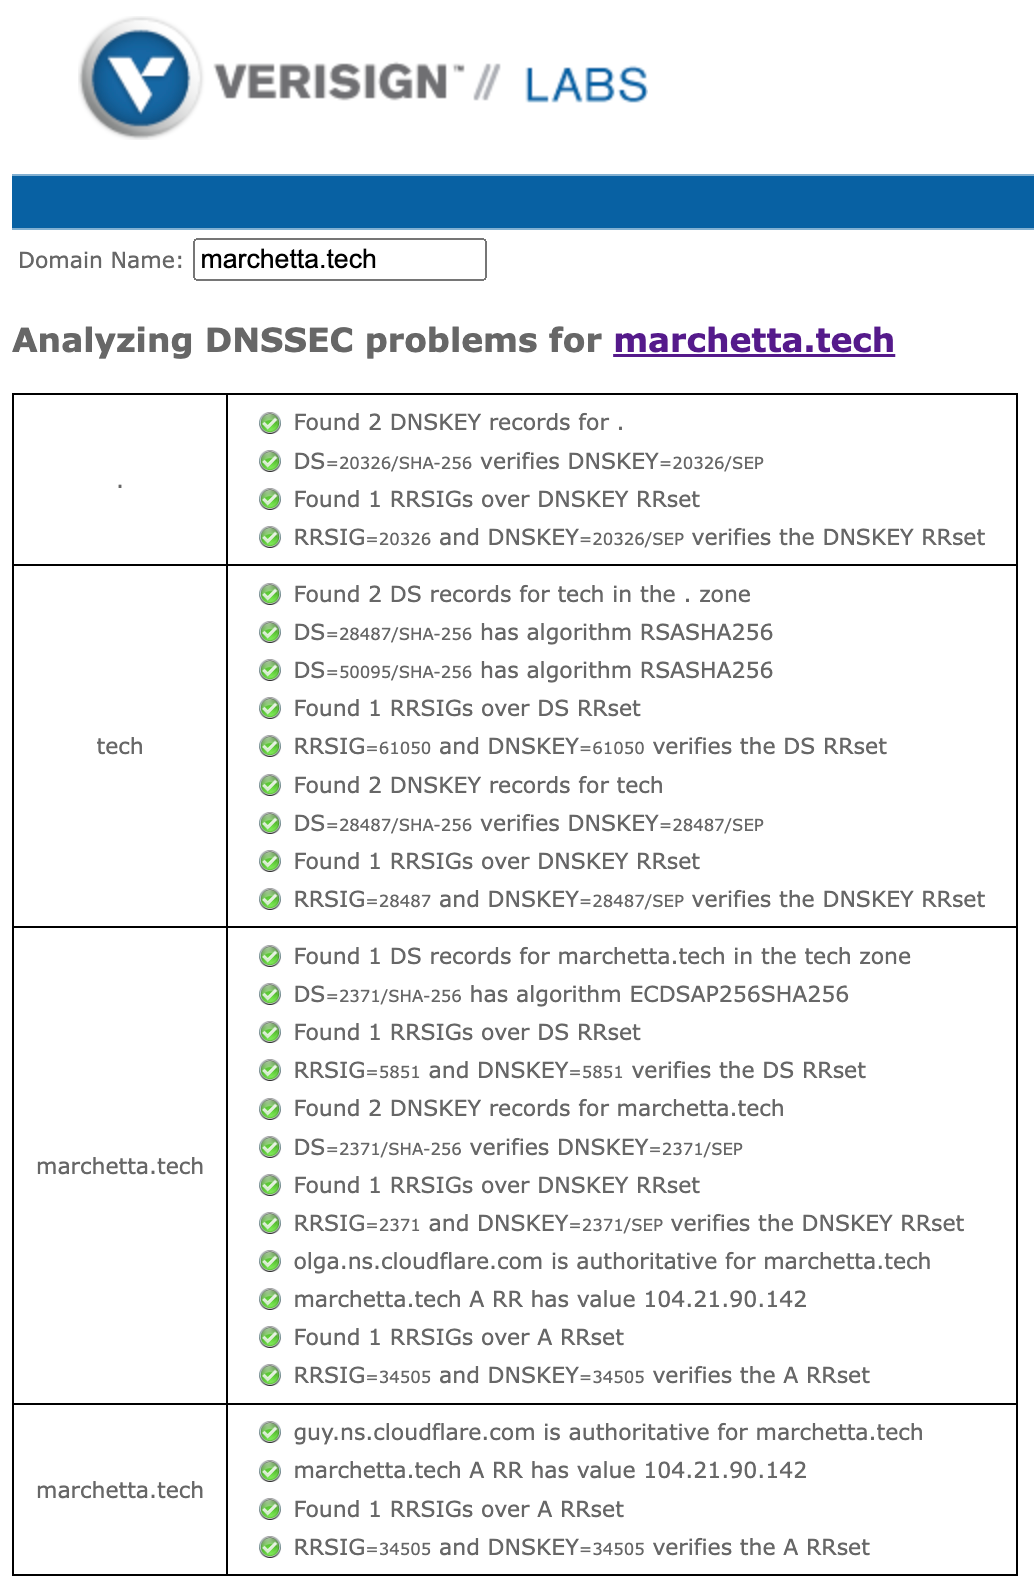
- Open the link: Verisign DNSSEC Debugger tool
- Enter the domain in the “Domain Name:” field, and then click on the “Query” button to test your DNSSEC configuration.
- Verify that DNSSEC is enabled and configured correctly (all green checks) for the domain.
2. Configuration steps to enable DNSSEC and SMTP DANE
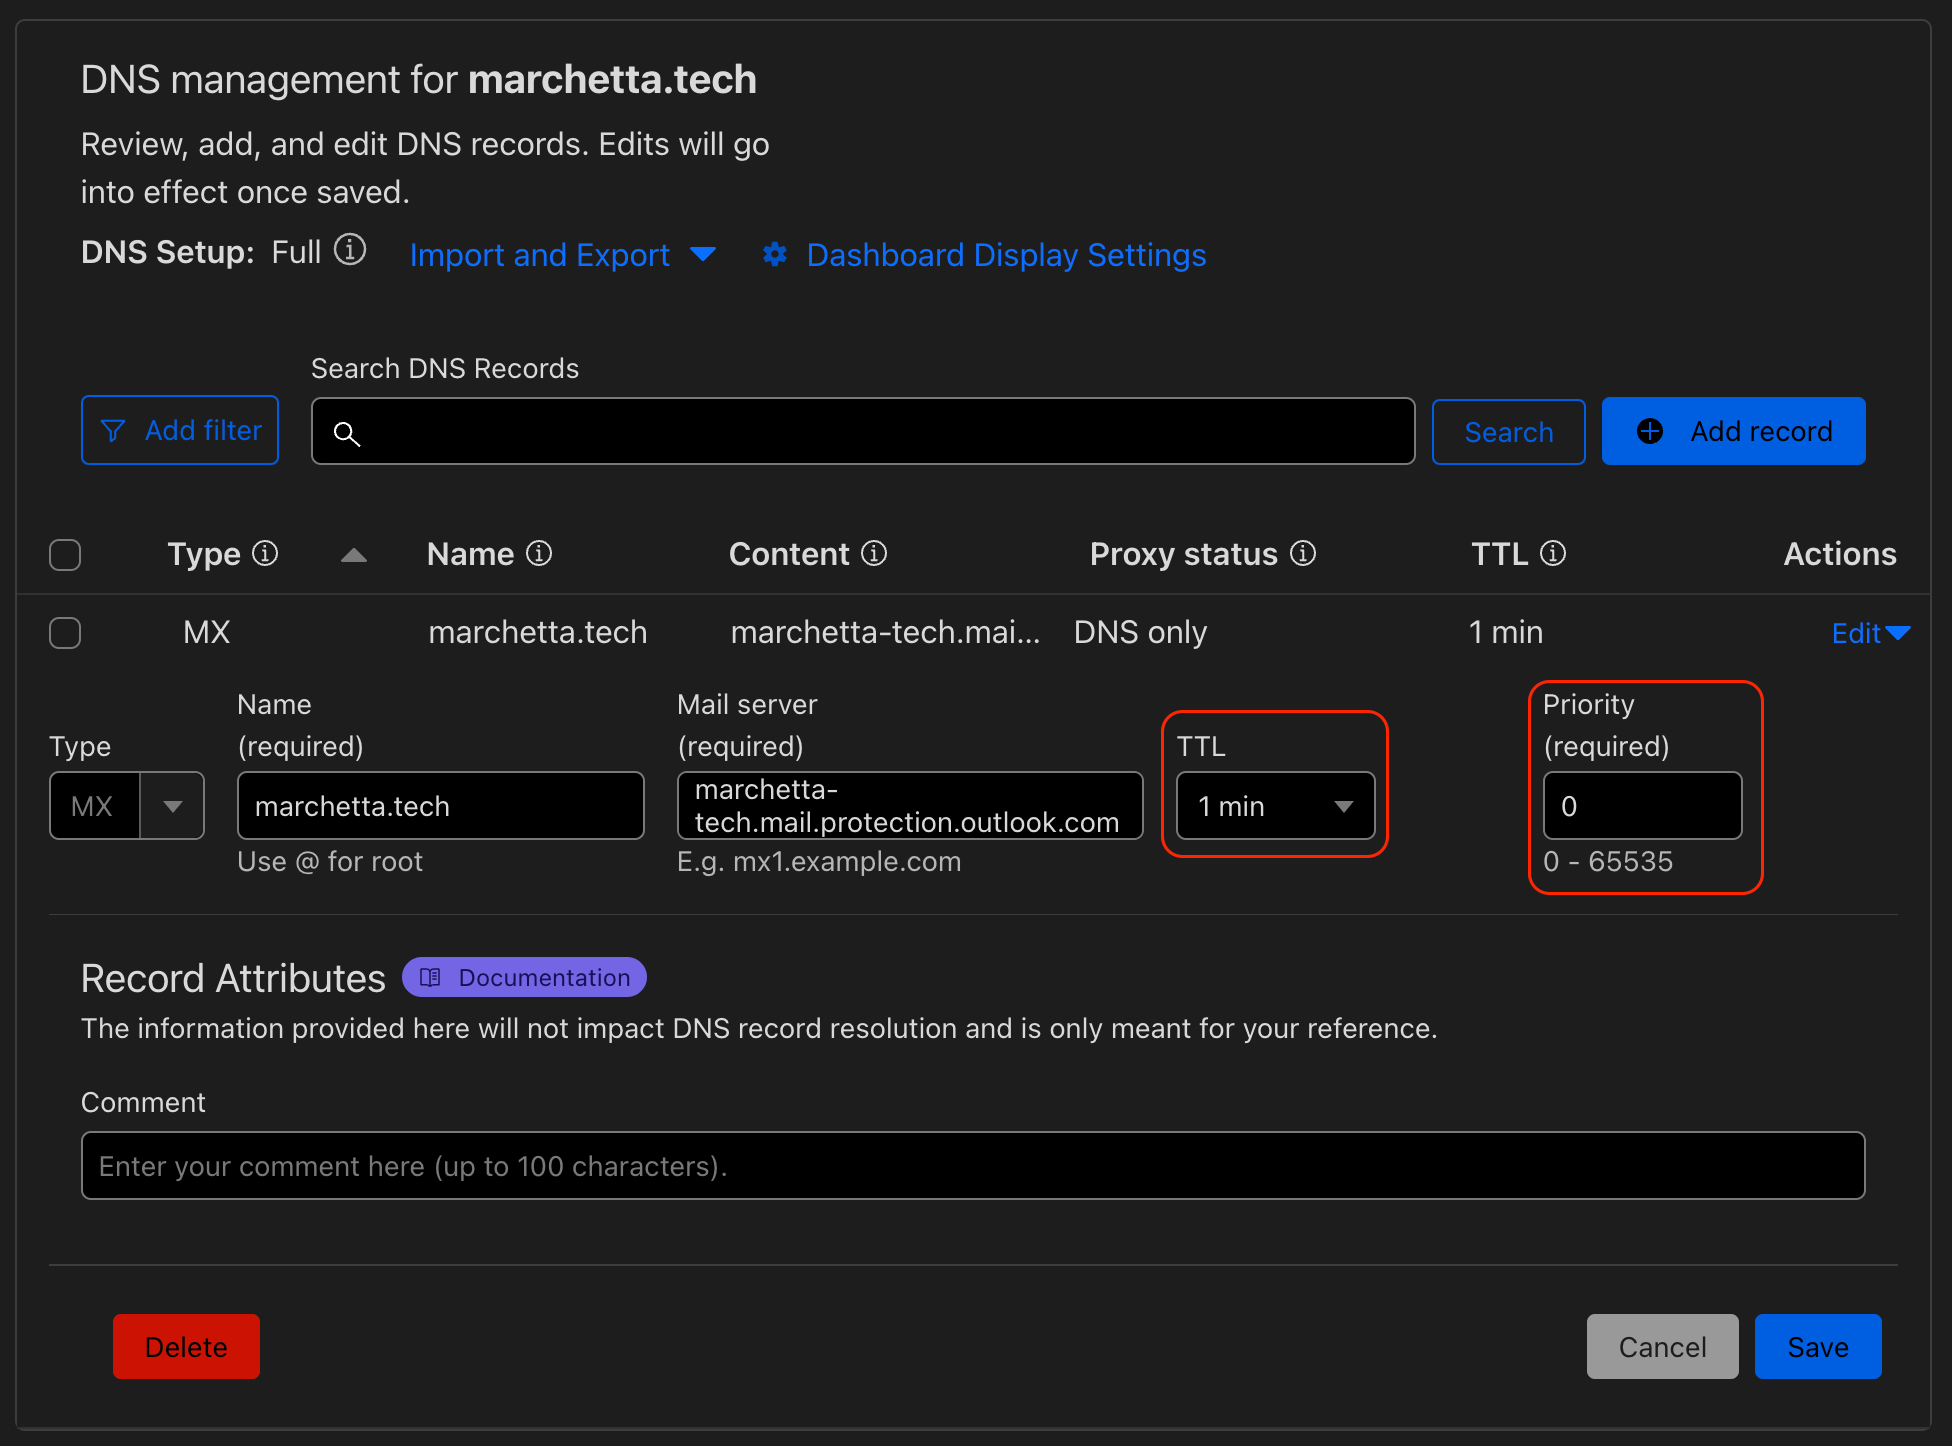
Update existing MX record TTL in DNS registrar
- Update the existing MX record's Time To Live (TTL) setting in your DNS registrar to the lowest value allowed. This will help for a quicker transition to the new MX record.
- Set the Priority of the existing domain to the lowest priority level possible with the domain registrar.
If the MX record had a high TTL, it's probably best to wait so that some time has passed for all the DNS servers to get the new record.
Install the exchange online management cmdlet via PowerShell. To install the Exchange Online Management PowerShell module, open PowerShell as an administrator and run the following command:
Install-Module -Name ExchangeOnlineManagement
After installing the Exchange Online Management PowerShell module, connect to Microsoft 365 tenant using the following command:
Connect-ExchangeOnline
This will prompt to enter credentials once connected to Microsoft 365 tenant now enable DNSSEC:
Enable-DnssecForVerifiedDomain -DomainName "your.domain"

3. Update MX Record
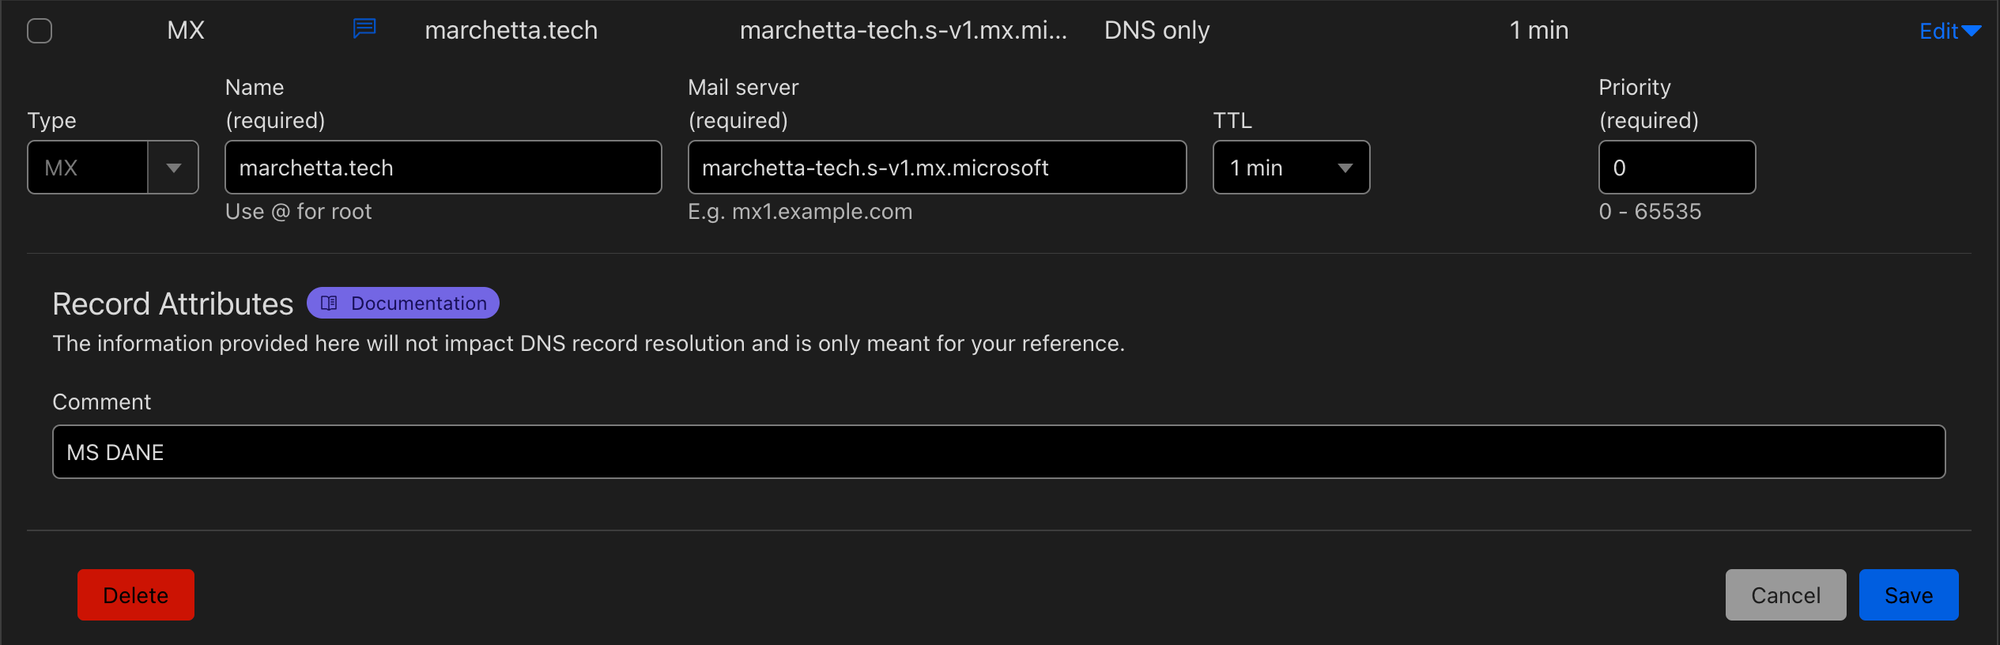
Update and replace the existing MX record on Domain registrar with the new MX from Microsoft.
4. Verify DNSSEC validation
- Go to DNSSEC Validation Test
- Fill in the domain name
- Select test type DNSSEC Validation
- Click Perform Test
Fill out the form and click “Submit” example.
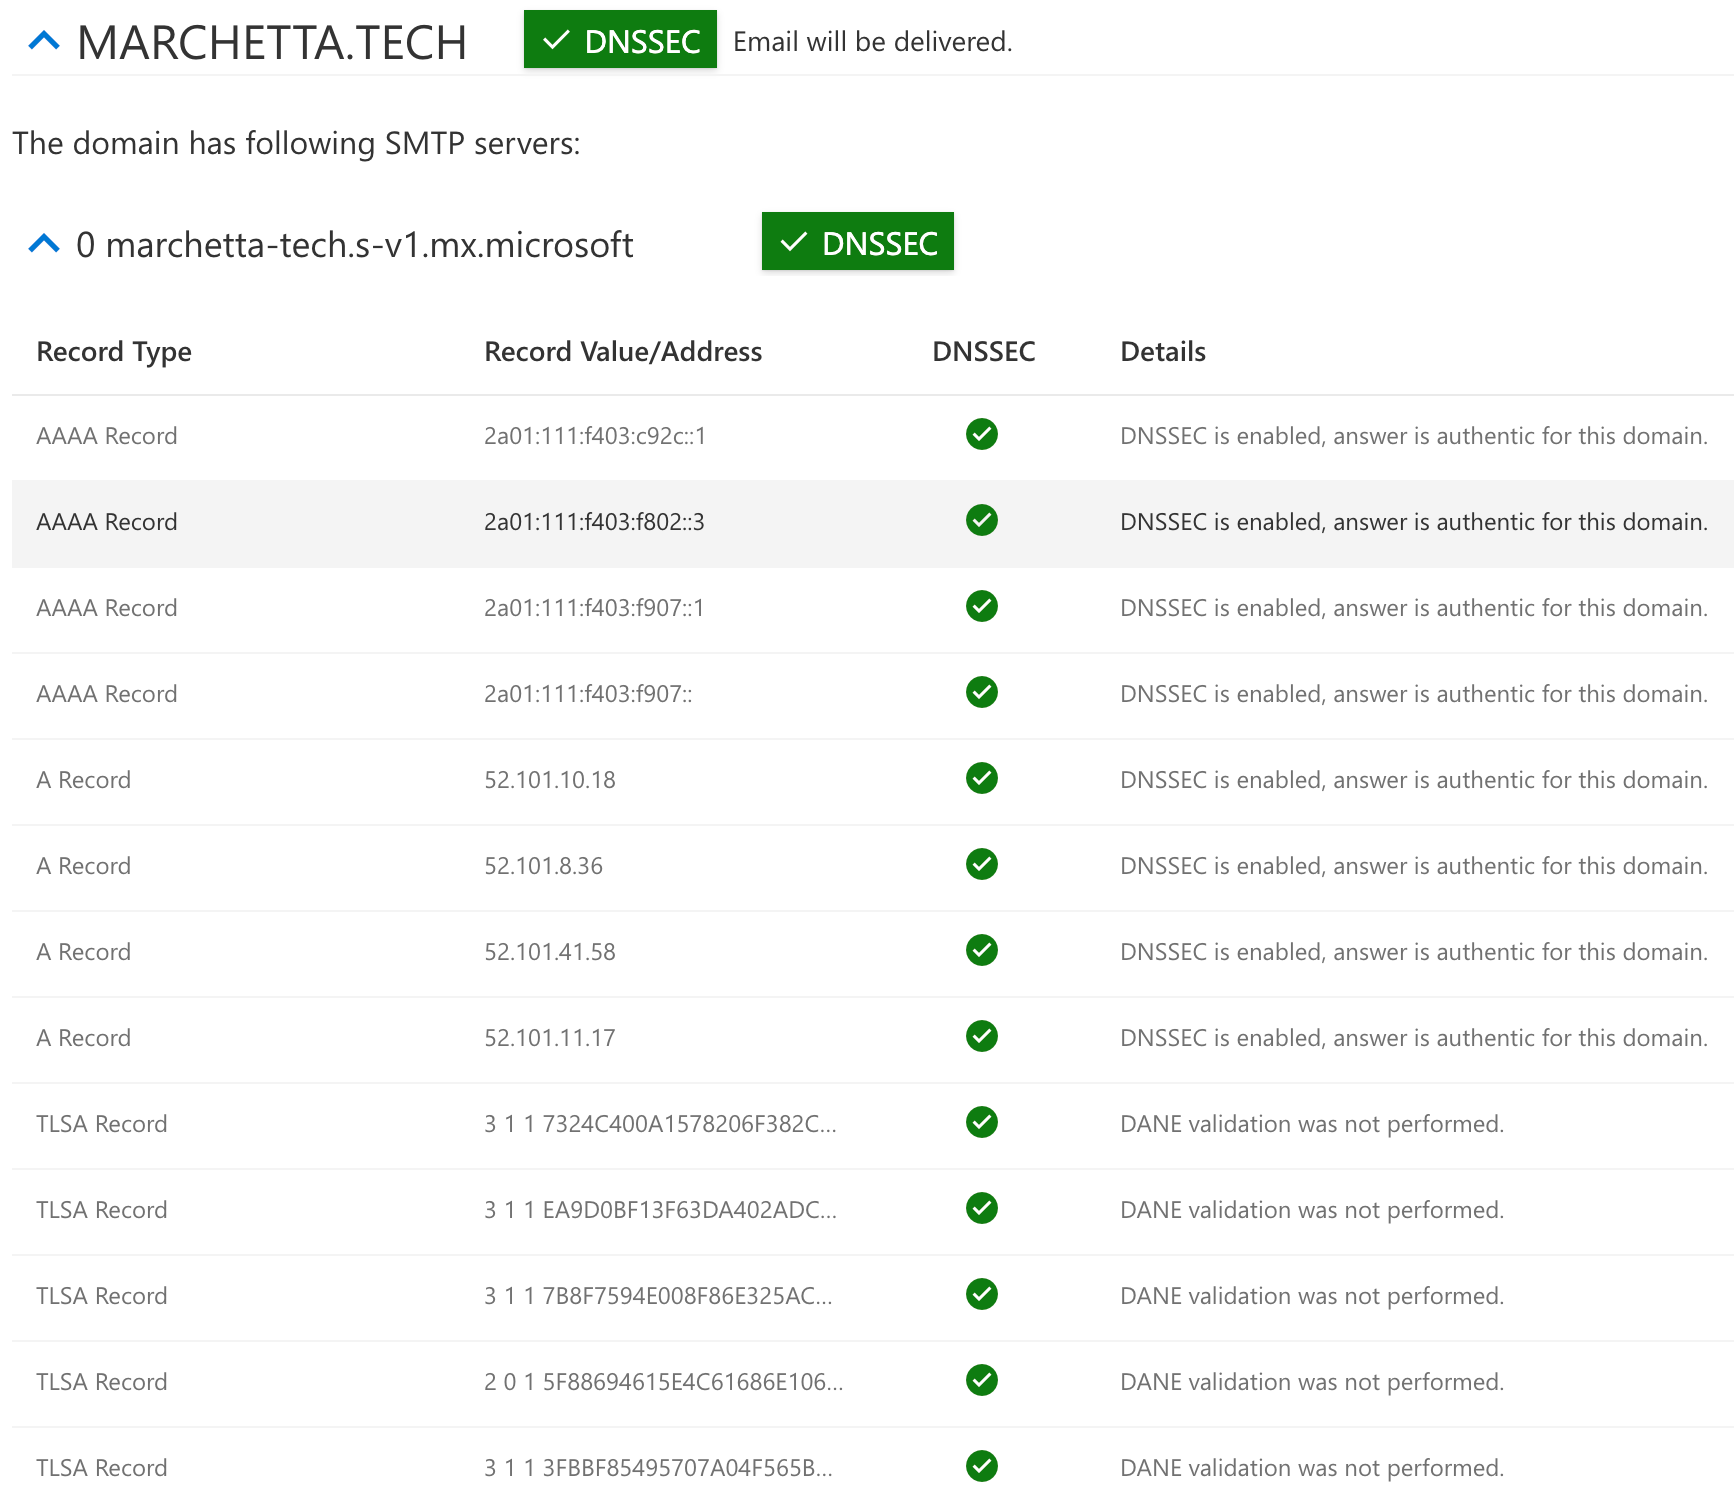
Output expected results…
All green checks.
5. Enable SMTPDANE
Now in Microsoft 356 tenant to enable SMTP DANE for your Exchange Online tenant, you can use the following PowerShell command:
This will enable DANE for all remote domains in your Exchange Online organization
Enable-SmtpDaneInbound -DomainName "your.domain"
Microsoft DNS propagation will need to occur before continuing. Please, wait 15 to 30 minutes (TSLA Record).
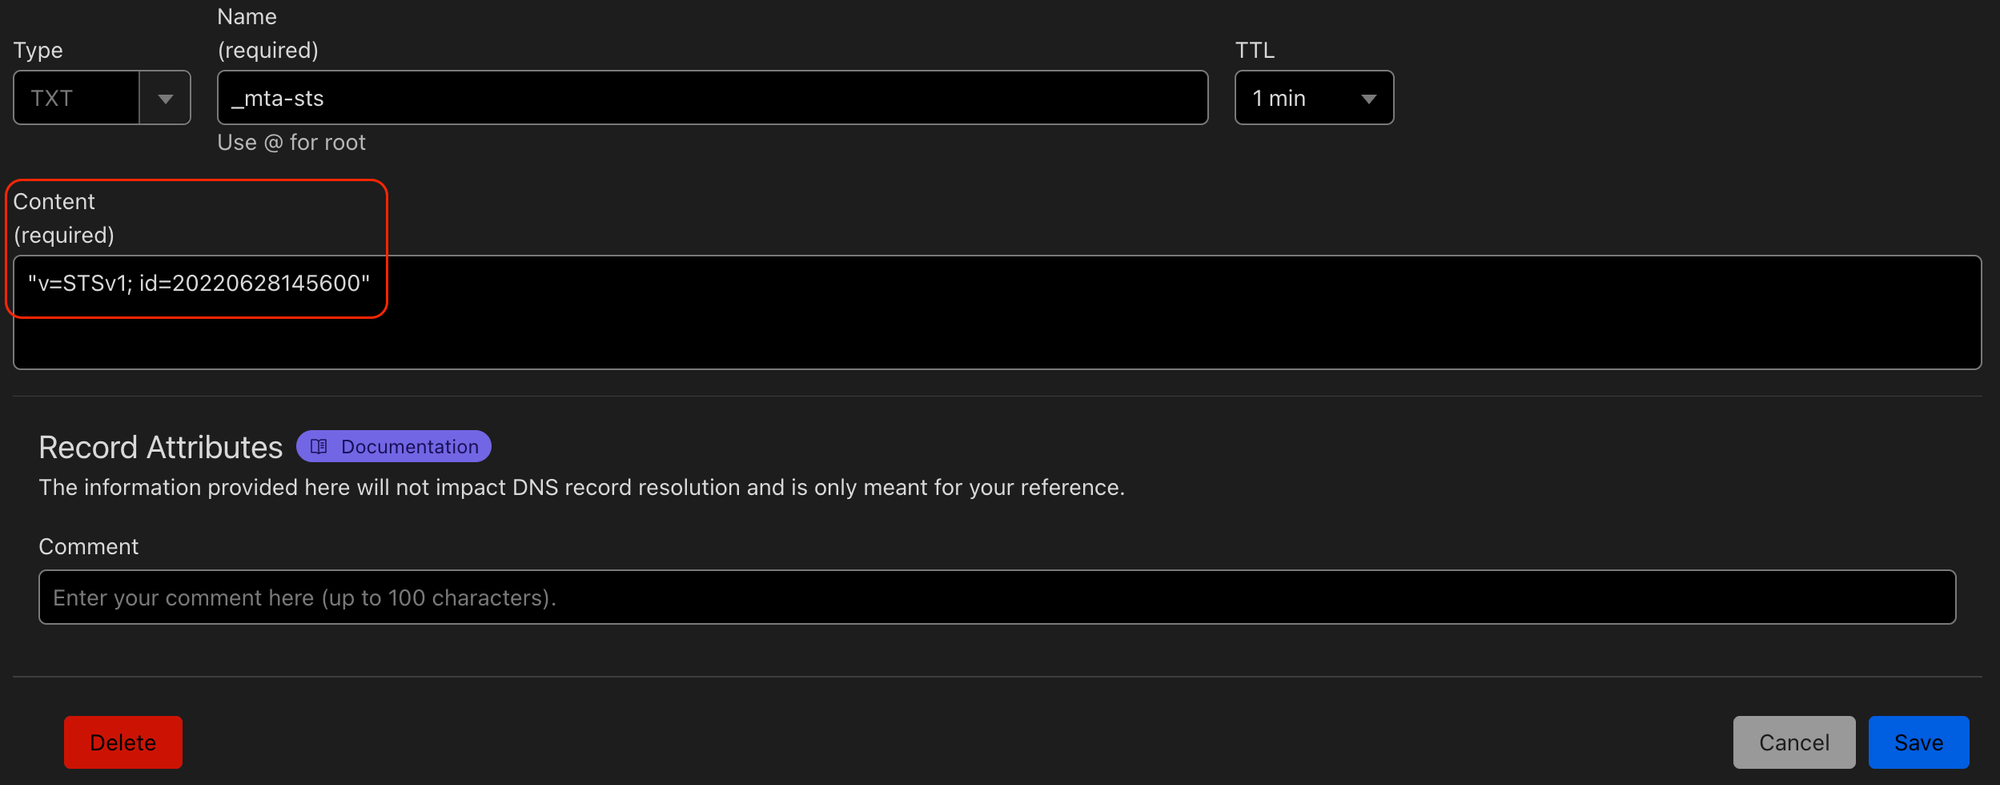
6. Update MTA-STS (Option)
There is no confliction with having MTA-STS and SMTP DANE they are actually two competing standards. If you would like to also set up MTA-STS click on this link. I have documentations that will help you set this up. [[Setup MTA-STS]]
If it's already configured, a modification to the webpage, MX record will have to be changed.
Old MTA-STS configs
version: STSv1
mode: enforce
mx: *.mail.protection.outlook.com
max_age: 2419200
new MTA-STS configs
version: STSv1
mode: enforce
mx: marchetta-tech.s-v1.mx.microsoft
max_age: 2419200
Change the MX configuration to point to the new MX record.
MX: marchetta-tech.s-v1.mx.microsoft
Once the MX configuration has been configured with the new MX provided by Microsoft. It will be best to change the ID. This will indicate to all the email servers that a modification has been made.
7. Verify DANE Validation (including DNSSEC)
- Go to DNSSEC and DANE Validation Test
- Fill in the domain name
- Ensure that you select test type DANE Validation (including DNSSEC)
- Click Perform Test
Fill out the form and click “Submit” example.
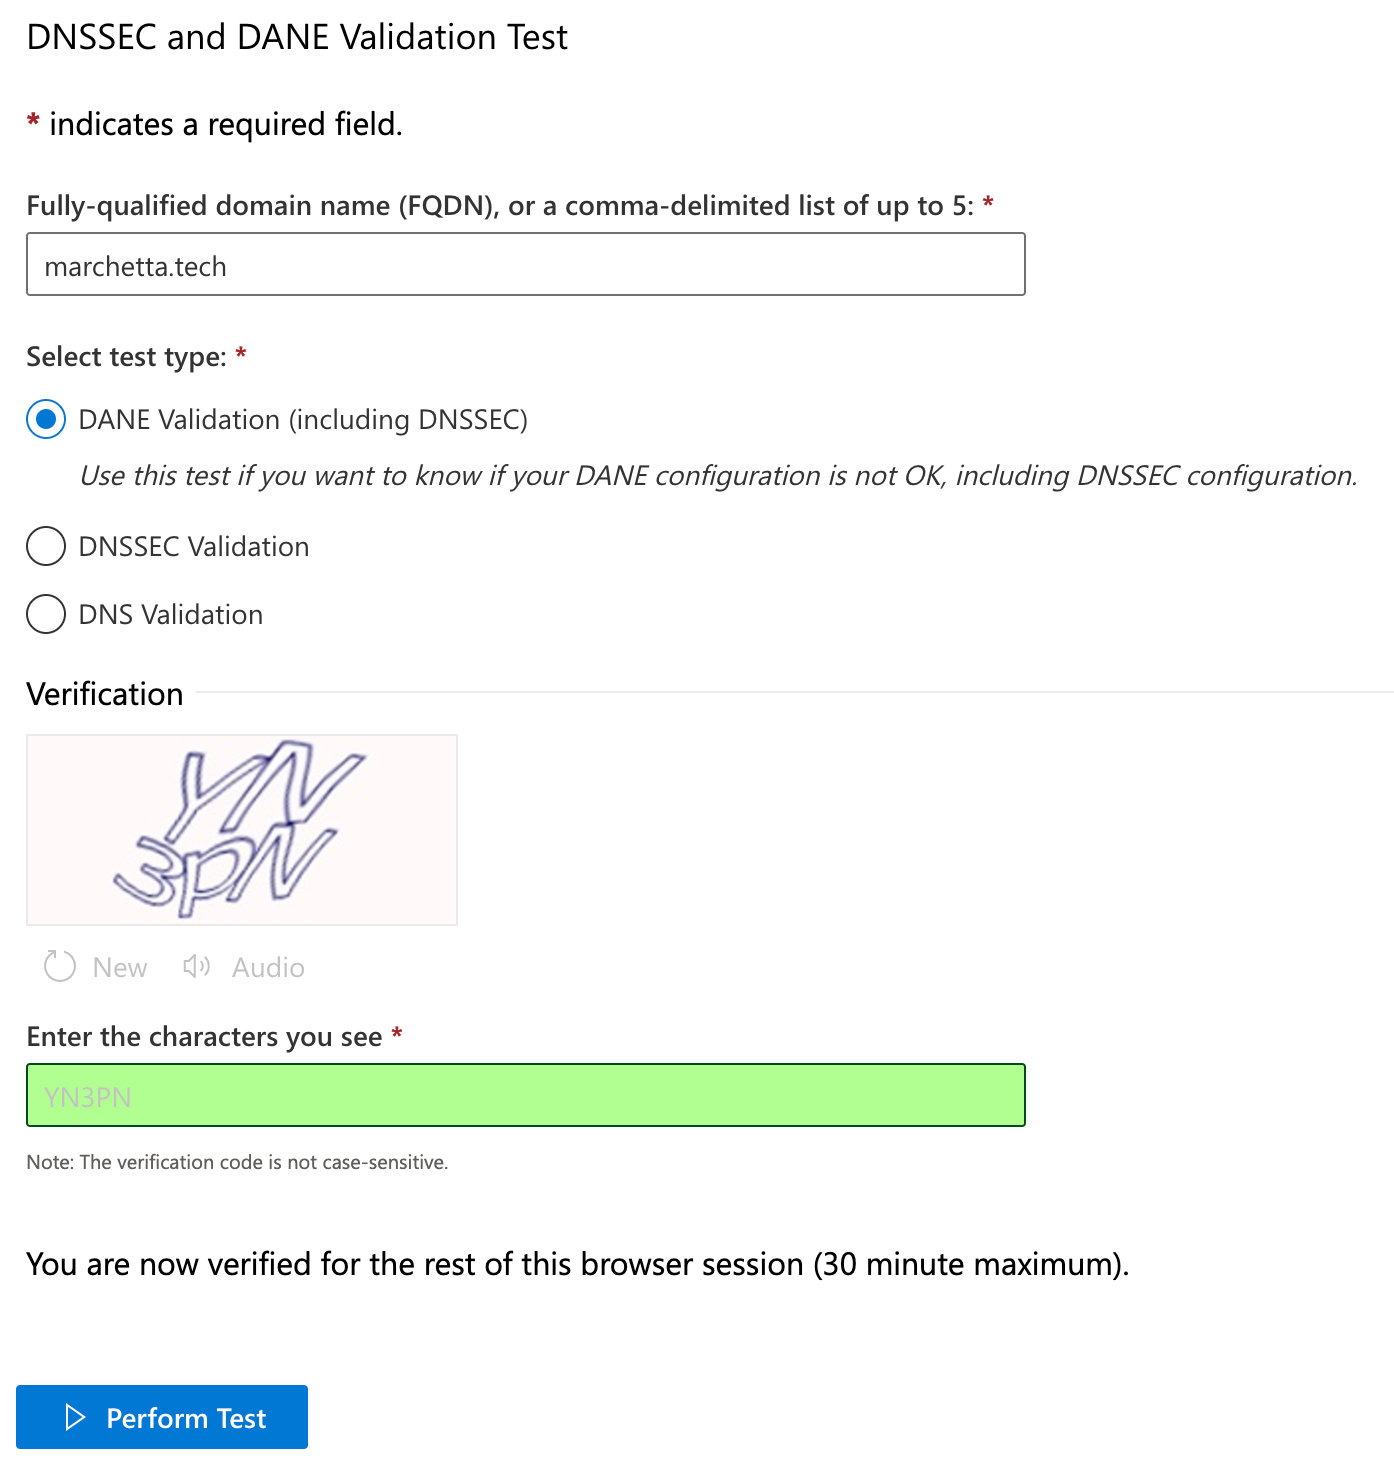
Output expected results…
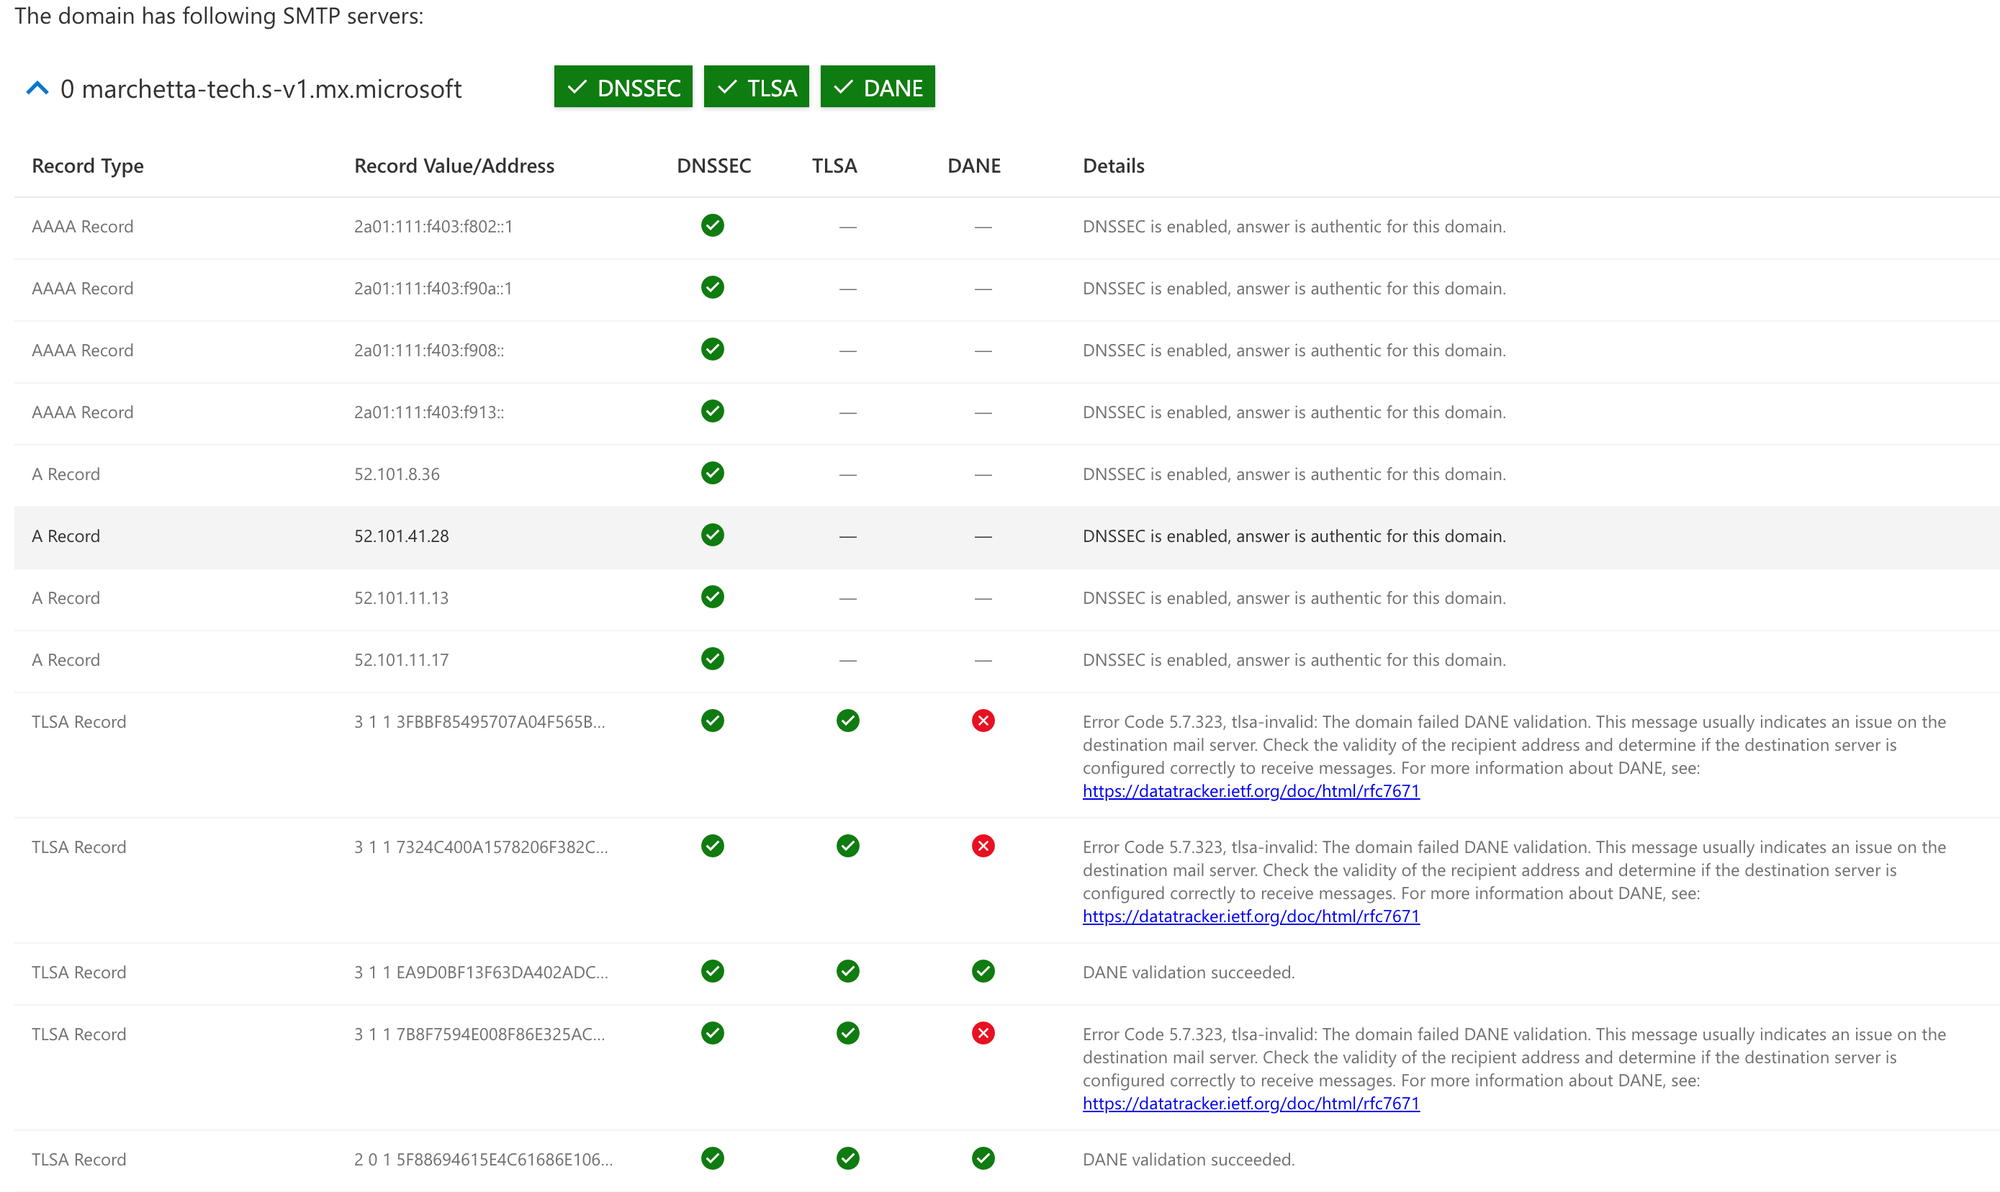
Not all TLSA Record need to be valid. Just one…
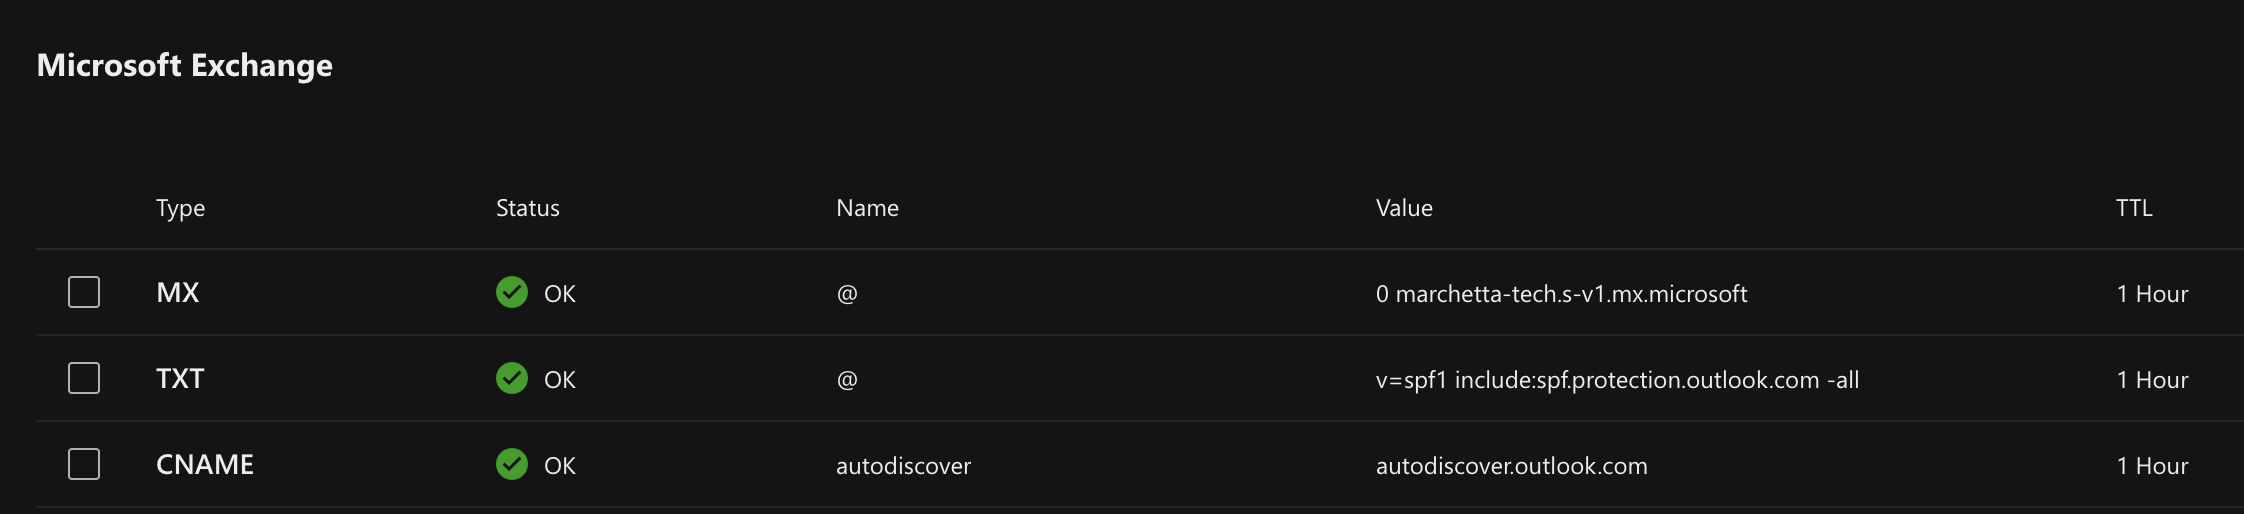
8. Configuration validation check
Once everything has been configured correctly. It can be confirmed by going to the Microsoft 365 admin center
Settings → Domains → The domain names → DNS record “Tab”.
Green checkmark should be across the board.
Credit:
https://www.alitajran.com/inbound-smtp-dane-dnssec-exchange-online/